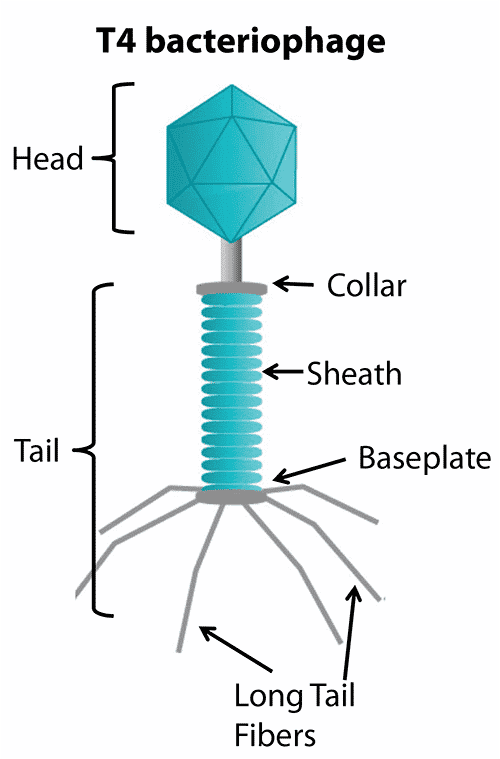
BACTERIOPHAGE
Let’s create a low poly model of a Bacteriophage.
Reference:
Setup
- Blender version 4.0
- Blender empty file
Workflow
- Delete the cube with
X -
In
Edit–>Preferences–>Add-onsActivate Extra Objects and Curve Tools plugin for curves
-
Go to front orthographic view with
NumPad 1or using the Navigation Gizmo
- Add the reference:
SHIFT-Aadd image referencebacteriophage.png GXto move reference to the left-
In the Outliner, Right mouse button (
RMB) and add a collection named Virus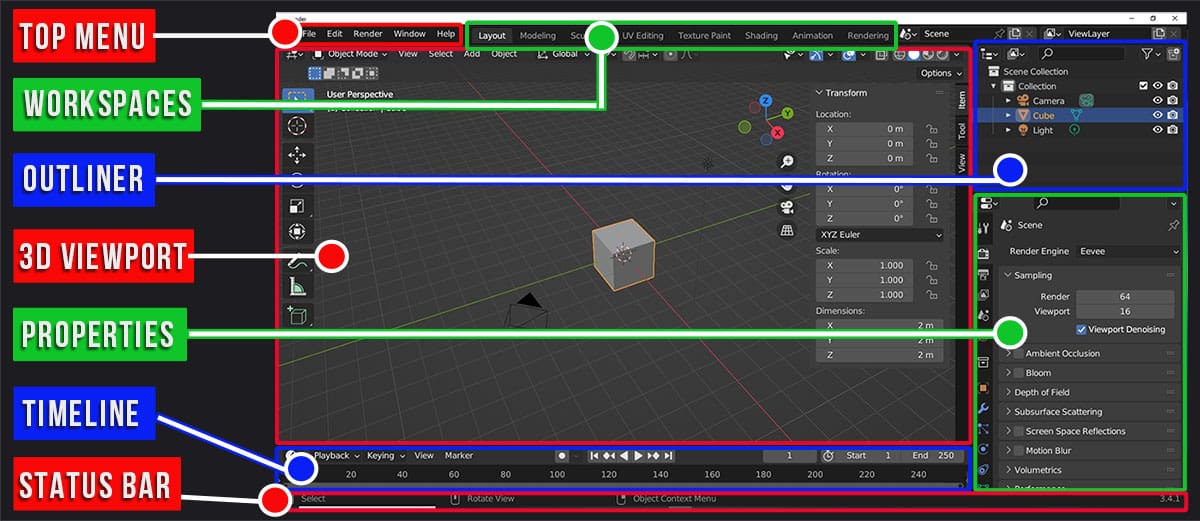
-
Add a Curve spiral archimedean
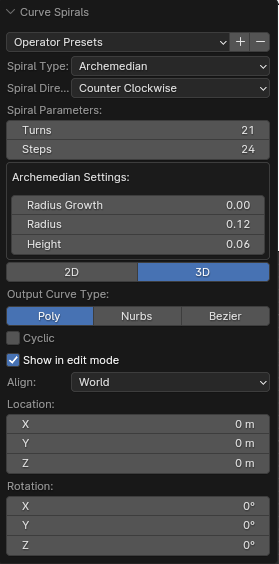
Parameter Value Turns 21 Steps 24 Radius Growth 0.0 Radius 0.12 Height 0.06 - In
Properties–>Data–>Geometry–>Bevel, set depth to0.035 - Add the baseplate, a cylinder with
64vertex, Radius.2and depth.1. - Edit mode with
TABand press2for edge select - Select edge loops top and bottom
ALT-LMBandSHIFT-ALT-LMB CTRL-Band Bevel increasing steps with mouse wheel- Duplicate for collar with
SHIFT-D -
GZto grab and move up collar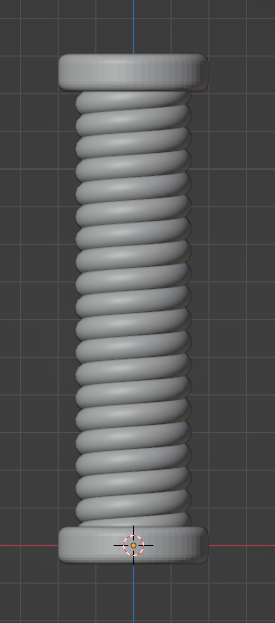
- Edit mode with
TABand press3for face select - Select top face of collar, extrude with
Ein place and scale, then extrude again to make the ‘neck’ - With top face of neck selected:
SHIFT-Sand2for cursor to selected - Object Mode with
TAB - Add Head icosphere with
SHIFT-Asubdivisions1and Radius0.5 -
Move Head up with
GZ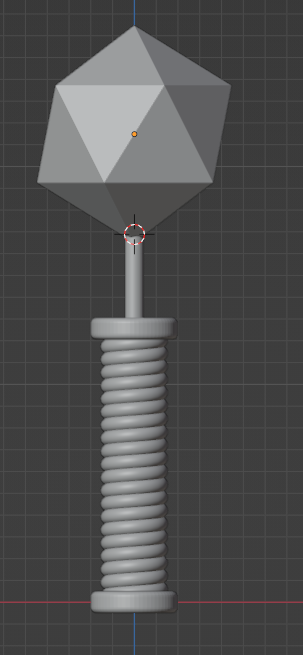
- Join collar and head: select collar in the Outliner,
SHIFT-LMBto select also head. Contextual menu withRMBand Join (shortcut:CTRL-J) - Select Sheath and
F3convert to mesh (orObject–>Convert–>Mesh) - In
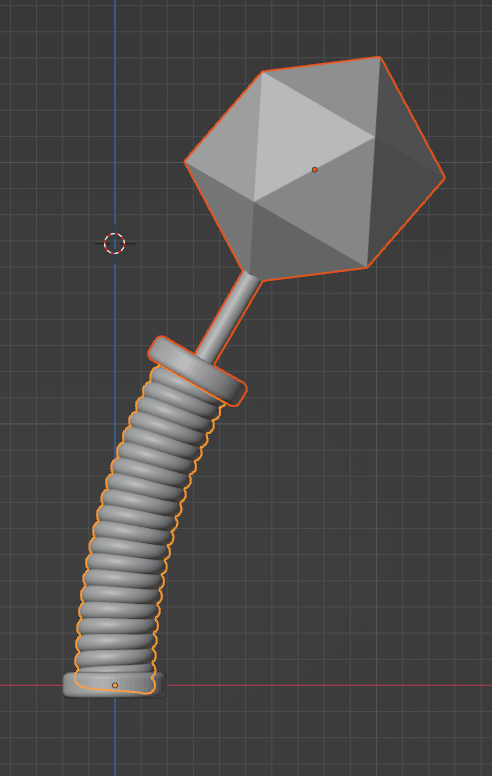
Properties–>ModifiersAdd simple deform modifier to the Sheath - Bend
0degrees - Test the bending changing the bend value and the axis.
- We need to connect the head now
- Select Sheat and go to Edit mode with
TAB -
select 3 top vertex in the middle line of coil
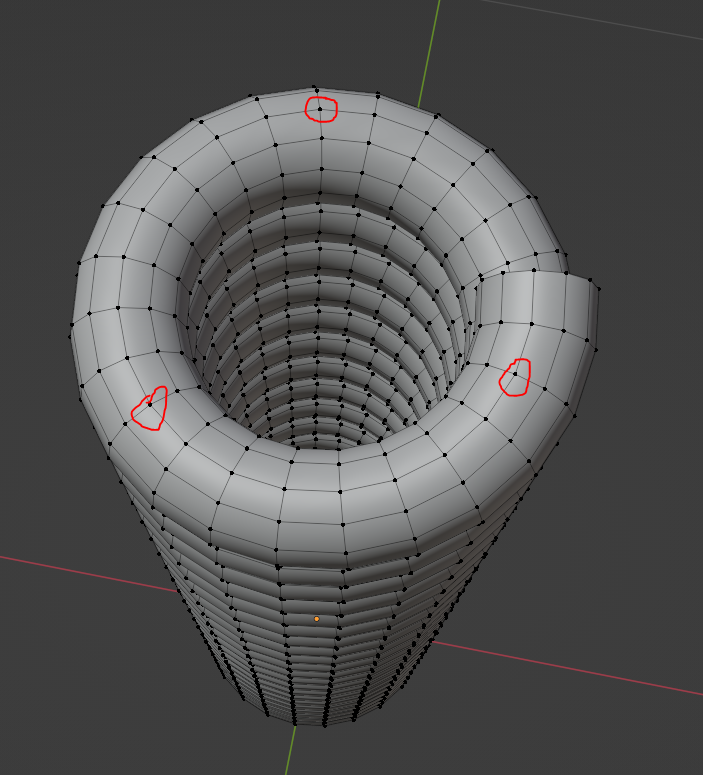
CTRLclick HeadCTRL-Pand make vertex parent-
Test the bending changing the bend value and the axis. Head should Bend with Sheat
SHIFT-Sand move cursor to origin- With
SHIFT-Aadd and Empty object to origin named it BendPivot - Set as Origin for the bend modifier, now we can rotate and bend!
- In the Outliner, hide the Virus collection (eye icon)
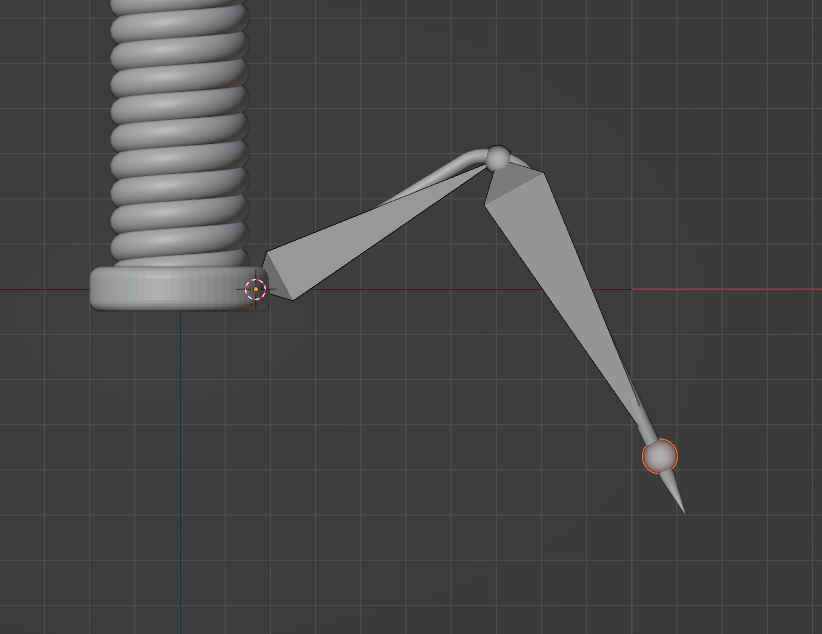
- Go to front orthographic view to make the Long Tail Fibers (legs)
SHIFT-A–>Curve–>Point-
You are now in Edit Mode press
Eto add a point for mid leg, pressEagain for second point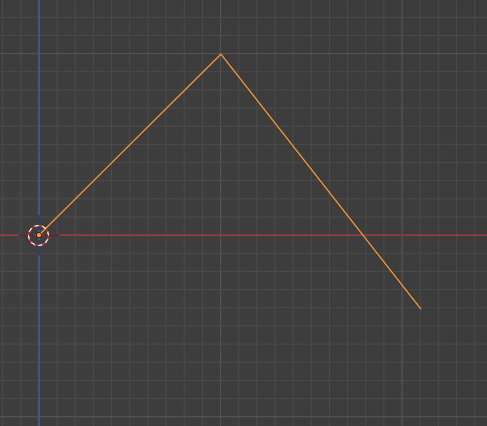
- Select mid point
NEdit Fillet/Chamfer- In
Properties–>Data, Set Geometry Bevel to0.035 - Go back to Object Mode with
TABand convert leg to mesh withF3 - Select edgee loop at the end with
ALT-LMBpressFto close 3for face select and extrude the new face,LMBto confirmS0to scale at0the tip of the leg- Go back to object mode and activate visibility for the virus collection
- Scale the leg with
S - In Outlier move leg to virus collection with
M - Go to Object mode and select leg, move in position with
GX - With leg selected and in Object Mode,
SHIFT-Sand move cursor to selected SHIFT-Aand add an Armature- Enter edit mode position top of bone in the middle of leg with
G -
Extrude and put at end of second bone at the tip of the leg
- Back to Object Mode
- Select leg
CTRL-LMBselect armatureCTRL-Pparent leg to Armature with Automatic weights- In
Properties–>Objectset bones Object properties display as wire - Move armature to virus collection
- We now have a rigged leg! Go to Pose Mode, select bones and test the leg poses
- Go back to Object Mode
- Select Sheat,
CTRLselect Bend pivot and parent withCTRl-P -
Parent Bend pivot to baseplate. Current objects parenting:
graph TD; Baseplate-->Sheat-->Head; SHIFT-Scursor to world originSHIFT-Ainside Virus collection add an empty sphere with radius0.5. Name the object “virus” (model control point)- Parent baseplate to control point:
LMBselect baseplate,CTRL-LMBselect virus control point,CTRL-Pand parent object. -
Current objects parenting:
graph TD; Virus-->Baseplate-->Sheat-->Head; - Go on top view with
NumPad 7or navigation gizmo -
Parent rigged leg to baseplate:
graph TD;
    Virus-->Baseplate-->Sheat-->Head;
    Baseplate-->Armature-->Leg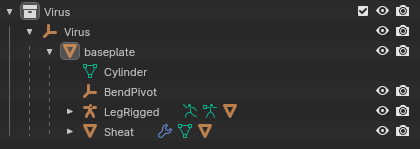
- Transform Pivot Point to 3D cursor on top of 3D Viewport
- Select Armature and Leg (with
CTRLcick), Duplicate withDand Rotate 45 withR45
Blender file: bacteriophage.blend